Pin it plugin

Pin it plugin

Related Posts Plugin for WordPress, Blogger...
Powered by Blogger.
RSS

The Slice of Joy- Pizza Margherita

i

Sometime long back in history, I had known that the Queen Margherita of Italy was served a pizza which signified the flag of Italy, consisting of tomato suggesting of the color red, the mozzarella representing the color white and basil representing the color green.. To me every slice of this  pizza implies the diverse colors of life. The green in this pizza represents energy to me, the red passion for life and white a way to brilliantly start my week, I couldn’t have found of an enhanced way to kick start my week with this slice of joy!

Ingredients
175gms of plain flour,
1 tsp salt,
1 tsp easy-blend yeast,
1 tbsp olive oil, plus more for brushing and drizzling
6 tbsp luke warm water
Topping,
350gms of tomatoes, peeled and chopped,
1 garlic clove, thinly slice,
55 g mozzarella cheese,
1 tsp dried oregano,                                                                                    
Salt and pepper,
Fresh basil sprigs to garnish

Sift the flour and salt together into a bowl and stir in the yeast, give it a mix. Make a well in between and add in the oil and lukewarm water. Stir well with a wooden spoon, till the time the dough begins to come together, and then knead the dough on a lightly floured surface with you hands for ten minutes.
Brush the bowl with oil, shape the dough into a bowl, roll the ball in the bowl to ensure that its coated with oil, to prevent of forming of the skin.. Put the ball in the bowl and cover it with a damp tea-towel. Leave it in a warm place to rise for hour, until the dough has doubled in volume.
Brush a baking tray with oil. Turn out the dough into a lightly floured surface, knock back the dough with you fist and knead for another one minute. Roll out the dough to a circle of 25 cms/ 10 inches with a rolling pin. Place on the prepared baking tray and push the edges of the circle slightly all round. Cover the baking tray with a damp tea towel and leave to rise in a warm place for 10 minutes.
Preheat the oven to 200C/400F/Gas Mark 6. Squeeze some juice out of the fresh tomatoes and roughly chop the flesh, spread them evenly over the pizza base and drizzle with oil. Sprinkle the garlic over the tomato, add the cheese, and sprinkle with the oregano and season with salt and black pepper. Bake in the pre-heated oven for 15-20 minutes, until the crust is golden brown and crisp.  Brush the crust with oil, garnish with basil sprigs and serve immediately.  

  • Digg
  • Del.icio.us
  • StumbleUpon
  • Reddit
  • RSS

Celebrating the British Bank Holiday and an Indian Festival!

Its almost immediately going to be the time to bid bye to the dazzling summers, yes it’s the Summer Bank Holiday in Britan today, and this also means its time to welcome the autumn, does that call for a merriment? By all means yes!
Banks holidays did mean a celebration back home where mom would cook the glorious of meals, which means bonding of the family again. While I was reminiscing the fond memories, I thought of organising an Indian feast to commemorate the British Bank Holiday, and ofcourse my friends couldn’t have said  no  but suprisingly,  they were just not looking forward to Indian food feista, they wanted to be part of organising this fête, which makes the whole thing all the more exicting. We decided on Chole Bhature. Chole is the spicy Indian curry made with chicpeas or garbanzo beans, slowly simmered with tomatoes and ofcourse the best of Indian spices and Bhatures are one of those sinfully delicious and wickedly delectable. To soothe down the spicy flavours I decided to add the pinapple raita.
We were absolutely enjoying the process of cooking the Chole, simmering it on low enjoying the aromas of the absolutely wonderful Indian spices with all the feelings of affection for over an hour to end up with an absolutely gorgeous  texture and the flavours of the chickpea curry, and the corriander garnish only made it more elegant with the flavours and aromas of the fresh herb.
 While I was preparing the dough for the Bhaturas, my friend thought an indian meal would be imperfect without chappattis, here we go, I added the humble chappittis to  make my meal more striking.
What added to the fun was my friends endeavor to roll chappattis t0 ending up with shapes of different countries. Entirely took me back to the times when my mom must have gone through this while I was a teengater learning to make chappattis.
What added to the celebration was the sizzles while frying the Bhatures, and while the oil was still bubbling, I remembered the pack of popodums which came straight from india, when my sister visited me last. Yes Indeed it was celebrating Indian food festival on a British Bank Holiday, just flawlessly yummy!!!
I absolutely love this recipe, previously coz of the way I grew up learning this recipe from  my mom  and now all the more because of the the way we cooked it in concert  for the big holiday!
Recipe – Chole
INGREDIENTS
2 tablespoons of cooking oil,
400 gms, can of tomatoes,
400 gms can of chickpeas,
1 bay leaf,
2 red onions, finely chopped,
4 garlic clove,
1 green chilli finely chopped,
1 inch of ginver finely chopped,
1 tsp ground tumeric,
1 tablespoon ground corrainder,
1 tablespoon of garam masala,
1 tablespoon of ground cumin,
1 tsp sugar,

salt to taste,
1 tablespoon lemon juice,
1 tablespoon tamarind paste,
½ cup of water,
1 tablespoon chopped fresh corrianger leaves

Heat the oil in the wok, add the bay leaf, ginger and garlic and let it cook for 1 minutes stirring it, making sure the garlic doesn’t burn, add the onions and cook them for 1 minutes, add the sugar and let the onions fry till the time they turn golden brown.
Add the chickpeas, the tomatoes, and all the spices and cook it on low with a cover stirring it every 5 minutes. When the tomato starts to thicken add the water and cook it further on low till the time the oil seperates from the curry.
After 30 seconds of turning down the gas, add the lemon juice and the tamarind paste and garmish with the fresh corriander leaves.


Recipe –Bhature
1 cup all purpose flour,
¼ cup natural yogurt,
2 tsp oil,
½ tsp sugar,
½ tsp salt,
½ tsp soda bicaronate

Sift together the flour, sugar, salt and soda bicarbonate. Add oil and incorporate it well with everything. Add the yogurt and knead  for 4-5 minutes to form a soft dough. Coat a bowl with few drops of oil and let the dough rest in the bowl covered with a damp tea towel for an hour.
After and hours knead the dough for 4-5 minutes again on a lighly floured surface. Divide the dough into 5 equal portions. Make each portion into a ball and roll it with a rolling pin into a circle of 5 inches. Do the same with the remaining portions.
Heat the oil upto 2 inches in the frying pan. Carefully slide the Bhatura into the hot oil and change after 30 seconds, until it turned golden brown. Remove to an oil absorbing paper. Repeat the same for the rest of the Bhatures


  • Digg
  • Del.icio.us
  • StumbleUpon
  • Reddit
  • RSS

Going Bananas!

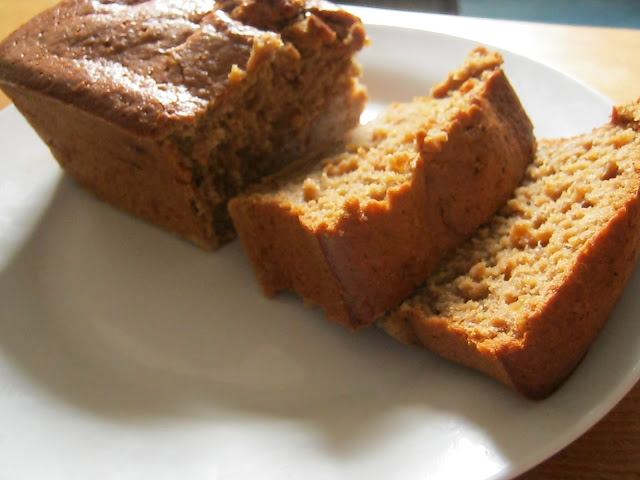
Banana loaf is one of the most wanted treats we always look forward to. Gentle with a crisp, brown crust and an intense flavour of bananas, its just the just the thing for a perfect weekend breakfast, perhaps with a hot cuppa coffee. Yeah Just don’t expect for it to last for long! This recipe is incredibly easy to make and I absolutely loved the simplicity of this loaf, so moist and bursting with the fruity flavours of banana and the orange juice with a hint of cinnamon.
 
CINNAMON BANANA LOAF
INGREDIENTS
Butter for greasing,
225 gms  self-raising flour,
150g demerara sugar,
Pinch of salt,
½ tsp ground cinnamon,
½ tsp ground nutmeg,
2 large ripe bananas, peeled,
175 mls organge juice,
2 eggs, beaten,
4 tbsp olive oil


Preheat the oven to 180C/350F/Gas Mark 4. Lighy grease and line a 900-g laof tin.
Sift the flours, sugar, salt and the spices into a large bowl. In a separate bowl mash the bananas with the orange juice, then stir in the eggs and oil. Pour into the dry ingredients and mix well.
Spoon into the prepared tin and bake in the preheated oven for 1 and ½  hour. Test to see if the loaf is cooked by inserting a skewer into the centre. If it comes out clean, the loaf is done. If not, bake for a further 10 minutes and test again.
Remove from the oven and leave to cool in the tin. Turn out the loaf, slice and serve.

  • Digg
  • Del.icio.us
  • StumbleUpon
  • Reddit
  • RSS

Living a Fairytale


I grew up my early days living a fairytale called London ! little did I know I will truly live this fairytale. Yesterday my friend Janet called up to plan for a day visit to London, in view of the beautiful weather.  Could I have refused my chance to live this fairytale all over again!  
London is indeed a dream come true,  the home of the British royal family, with no words to define the magnificence of the Buckingham Palace, the cosmopolitan always busy and bustling with people and the hackney carriages.  What augments to the exquisiteness of the city is so many folks from out of the country just in one time, not to mention to the beautiful sights, smells and sounds.
Not expedition to London would be complete without the shopping  spree starting from the trendy shops in Oxford street right through to the very elite stores in Savile Row and Bond street. And there couldn’t be a better way to end the day without a cruise on the River Thames through the heart of London, giving a spectacular views across the city, whereas the Tower of London gives a view of what life in London was like in days gone by.

The recipe for these fairy cakes, are a dedication to my fairytale, the London city, city of dreams!!


 115 g unsalted butter, at room temperature,
115 g caster sugar,
2 eggs beaten,
115 g self-raising flour,
Icing and decoration
200 g icing sugar,
About 2 tbsp warm water,
A few drops of edible food colouring,
Hundreds and thousands, and chocolate strands to decorate

Preheat the oven to 190C/375F/Gas Mark 5. Place 16 paper bun cases into a shallow bun tin.
Place the butter and caster sugar in a large bowl and cream together with a wooden spoon or electric mixer until pale and fluffy.
Gradually add the eggs, beating well after each addition. Fold in the flour lightly and evenly using a metal spoon.
Divide the mixture evenly between the bun cases and bake in the preheated oven for 15-20 minutes. Cool on a wire rack.
For the icing, sift the icing sugar into a bowl and stir in just enough of the water to mix to a smooth paste. Stir in a few drops of food colouring. Spread the icing over the fairy cakes and decorate with the chocolate strands and hundreds and thousands


  • Digg
  • Del.icio.us
  • StumbleUpon
  • Reddit
  • RSS

Say Cheese!!


Finally the much looked-for the Big Cheese Festival was here.  Placed in the shade of one of the most beautiful  Castle, in the town of Caerphilly, it indeed was an extravaganza of life, the cheese festival was full of activitiy from the beginning to the end, live history encapment, drama, music, and so much more. Yes ofcouse the cheese festival was about cheese, starting from cheese tasting to cooking  demonstrations  using  assortment of cheese.  It was indeed very exhilarating  to know so much about cheese, the diverse manufacturers, the unusual class of cheese.


With the sun shinning so bright and to make the more of the summer warmth I thought of making this cheese festival a perfect celebration.  Yes it had to be this vivacious, bursting with the fruity flavours of lemon, the lemon cheesecake.
So creamy, so comfortimg, with a hint of crunch this cheesecake is the ultimate pudding and whatmore other than it being so delectable it is so quick to make.  Absolutely naughty , and summery, this cake is a perfect treat!!


INGREDIENTS
10 digestive biscuits,
500 gms mascrapone cheese,
200 gms castor sugar,
2 tbsp icing sugar,
1 tbsp honey,
75 gms butter,
Juice and zest of 1 lemon

Crush the biscuists nice and small, leave a few chunky bits. Melt the butter, and add the butter and honey to the crushed biscuits.
Brush the bottom of  23cm/9 inch springform tin with some of the melted butter and line the bottom with a greaseproof paper,
Tip in the biscuit mixture in the spring-form tin, using the back of a spoon, slowly push the crumbs from the center going towards the edges, until levelled  and smooth. This is the base for the cheesecake. Put the spring-form tin in the mixture while making the cheese filling.
Mix the mascarpone cheese with caster sugar, icing sugar, lemon juice and the zert until well combined. Spoon it on the biscuit base and set it in the fridge for atleast 4 hours.
Before serving, run a hot cloth around the cake tin for the cake to ease out.


  • Digg
  • Del.icio.us
  • StumbleUpon
  • Reddit
  • RSS

Take a Big Bite out of life- Chinese Stir Fry Noodles

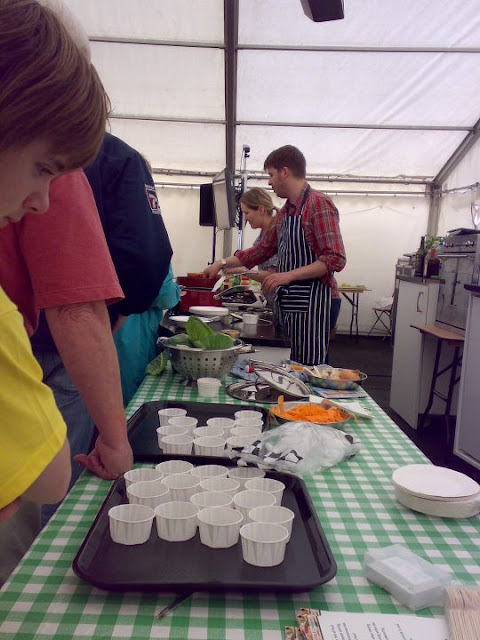
The weather this weekend was not too inspiring to go and have fun. But my heart was stuck on the Big Welsh Bite taking place in the local park. Somehow I persuaded my friend to toddle up to the park, and it took only some seconds for the doldrums to transform to a joyful grin. The gorgeous park greeted tens of thousands of citizens of all ages by saying TAKE A BIG WELSH BITE OUT OF LIFE . I caught up with my Chinese friend during the walk. What a festive day it was the park full of astounding animals, appealing  display arts and crafts, and delicious local produce. It was indeed a big treat for all of us. Me and my friends were commemorating a enhanced way of living only to realize there was more, Cooking demonstrations, we squeezed in two of the demonstrations in our time, wow the wonderful strawberry meringue and mixed herb quiche by a Persian Chef, we were about to leave when I saw loads of Indian spices around and couldn’t wait to identify why? Wow it was my chance to learn Indian curries and pilau from a British Chef, well nothing seemed more imperative then attending this cookery demonstrations. I was taken aback by the authenticity of the food this wonderful British Chef cooked. It was indeed an indulgence for all of us. Well this was still not the end of this.  This wonderful chef had vegetables to take away from his fresh produce, and before we left the tent, our hands were full of broccoli, spring onions, ginger, garlic, peppers, carrots and so much more. With a Chinese friend around, and so many fresh vegetable, my mind can only thing of one thing, yes Chinese Stir Fry noodles, I just had to pick up a packet of noodles from supermarket on our way back home, and yes indeed IT WAS TAKING A BIG BITE FROM LIFE!!!

 INGREDIENTS
4 cloves of garlic,
2 thin slices of ginger,
½ carrot, grated,
Bunch of Bok Choy,
½  Yellow pepper, sliced
1 Red onion, sliced
4 Tbsp soya sauce,
8 tbsp vegetable oil,
1 bunch of spring onions finely chopped,

1 tsp chili flakes,

Salt and pepper


Boil the noodles as per the instructions given on the packet. Heat the wok, add three tablespoons of vegetable oil, wait for few second for the oil to get hot, and then add two cloves of crushed garlic and one slice of ginger. Stir fry them for a few second till the time they begin to sizzle, and you can smell the aroma of ginger and garlic. Then add the red onion; stir fry the onion, till the time they become translucent. Add yellow pepper and stir fry the yellow pepper till the time its half cooked, and this out of the wok into a plate.
Reheat the wok, add 5 tablespoon of oil again, and wait till the oil is hot, add the noodles, turn down the fry, and stir fry the noodles with oil, and add the soya sauce and keep tossing, the noodles with oil and soya sauce. Make sure that every noodle has oil and soya sauce in it. Add the remaining ginger, 2 cloves of crushed garlic, spring onion, carrots and Bok Choy  and stir fry for two minutes. Add the earlier stir fried vegetables and mix well.


  • Digg
  • Del.icio.us
  • StumbleUpon
  • Reddit
  • RSS

Golden Christmas Cake

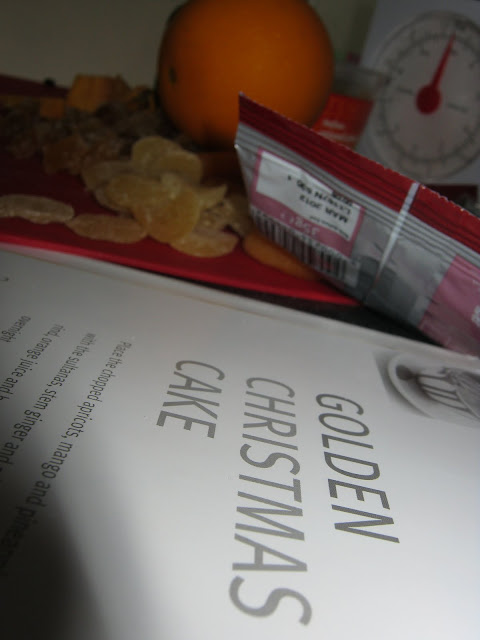
It’s the orange time of year and we were ready with our wish list for Christmas, of course the list would be imperfect without a Christmas cake. Today marks the sacrament of my Christmas cake for the year.  The most heavenly thing I have ever cherished and it wouldn’t be Christmas without it.  So now is the time to put together my Christmas cake and let it sit all the way till Christmas , letting it get more and more aromatic, and just naturally gorgeous ever since.  It was during this time of the year that my gigantic pudding basin came out to make the Christmas cake batter. For the cake has to be shared with a lot numerous. It was so much enjoyable, being occupied in preparation of the cake, from chopping of the fruits and nuts, to measuring and then beating up the batter.
The cake looked rich, moist, and a zillion pieces of fruit in every bite, bursting with diverse taste of brandy, and orange, as much as I love Christmas cake I found myself lured to cut a portion and pad the space with marzipan while icing.  Next year I will make two cakes !!!
The cake now has been moved to a very festive looking tin, waiting for everyday to make the cake taste better!

175g/ 6oz dried apricots,
85g/3 oz dried mango,
85g/ 3oz pineapple,
175g/ 6oz sultanas,
55 g/ 2 oz chopped stem ginger,
55 g/ 2 oz mixed peel,
finely grated rind and juice of 1 orange,
4 tbsp brandy,
175g/ oz unsalted butter,
100 g/ 3 1/2 oz light muscovado sugar,
4 eggs beaten,
2 tbsp clear honey,
175 g/ 6oz self-raising flour,
2 tsp ground all spice,
85 g/ 3 oz pecan nuts,

Place the chopped apricots, mango and pineapple in a bowl with the sultanas, stem ginger, and mixed peel. Stir in the orange rind, orange juice and brandy. Cover the bowl and leave to soak overnight.

Preheat the oven to 170C/325F/Gas Mark 3. Grease a 23-cm/9-inch round springform cake tin and line with baking paper.

Cream together the butter and sugar until the mixture is pale and fluffy. Add the eggs to the mixture, beating well between each addition. Stir in the honey.

Sift the flour ith the allspice and fold into the mixture using a metal spoon. Add the soaked fruit and pecan nuts, stirring thoroughly to mix. Spoon the mixture into the preparted tin, spreading evenly, then make a slight dip in the center.

Place the tin in the centre of the preheated oven and bake for 1 1/2 to 2 hours, until golden brown, and firm to the touch and  a skewer inserted into the center comes out clean. Leave to cool in the tin.

Turn the cake out, remove the linining paper and re-wrap in clean baking paper and foil.
Store in a cool place for at least 1 month before use.

  • Digg
  • Del.icio.us
  • StumbleUpon
  • Reddit
  • RSS

Wild Mushroom Risotto

I was sitting onto the patio of our back garden, holding the steaming mug of coffee between my hands; I could see the sun slowly emerging over the grassy hummocks in the horizon, setting the sky in different colours. The air was energetic with a symphony of birds singing, full of aroma of the early blossoms. Eloquent dewdrops of moisture on the fresh bud reflected the magnificent butterflies as they softly slithered over the flowerbeds. Within a few minutes of this incredible panorama unfurled before my eyes, I received a call from a childhood friend travelling from India, visiting me for lunch. Yes I knew spring is the time to reconnect, and time to enliven our minds. I couldn’t wait to push the boat out my friend’s advent with this elegant risotto, distinguished with white wine and earthy notes of wild mushrooms. Simple yet fulfilling!!


1 shallot,
½  garlic clove,
80 gms butter,
1 tbsp olive oil,
250 gms Arborio rice,
200 gms wild mushroom (porcini, shiitake, oyster),
150 ml white wine,
750 ml vegetable stock,
100 gm Parmesan cheese,
1 tsp rosemary,
1 pinch of salt,
1 pinch of black pepper,
2 tbsp  fresh cream

Chop the shallot and onion finely. Add half of butter and olive oil to the pan.  Add the shallot and onion and sweat it until translucent.
Add the Arborio rice, sweat for a minute add wine. Add salt and pepper and let the wine cook away. Add the mushrooms, cook for 2 minutes and stir with a wooden spoon.
Add plenty of vegetable stock to keep the rice covered in liquid.  To achieve a creamier texture just toss the rice regularly.
Cook the risotto for about 20 minutes adding hot stock from time to time little at a time. Grate the Parmesan cheese, and toss with the remaining butter. Add rosemary, then the whipped cream and mix well. 


  • Digg
  • Del.icio.us
  • StumbleUpon
  • Reddit
  • RSS