Pin it plugin

Pin it plugin

Related Posts Plugin for WordPress, Blogger...
Powered by Blogger.
RSS

Caesar Salad Dressing

 Ingredients


2 tables spoon sour cream
2 Table Spoon mayonnaise
2 Table spoon olive oil
2 Tbsp lemon juice
1 tsp Dijon mustard
freshly ground black to taste
Salt to taste
2 cloves small garlic finely minced
Croutons:
1/2 loaf French bread 1-2 days old
3 Tbsp olive oil
3 cloves garlic pressed with a garlic press, grated, or finely minced
1/4 each salt and black pepper
Salad:
1 large head Romaine lettuce chopped

INSTRUCTIONS

In a  mixing bowl, add all ingredients and chill until serving.

  • Digg
  • Del.icio.us
  • StumbleUpon
  • Reddit
  • RSS

Strawberry Milkshake


Ingredients

3 cups strawberries fresh or frozen

3 glasses of skimmed milk

2 tbs honey

Put all the ingredients together and blend and served in chilled glasses. 

  • Digg
  • Del.icio.us
  • StumbleUpon
  • Reddit
  • RSS

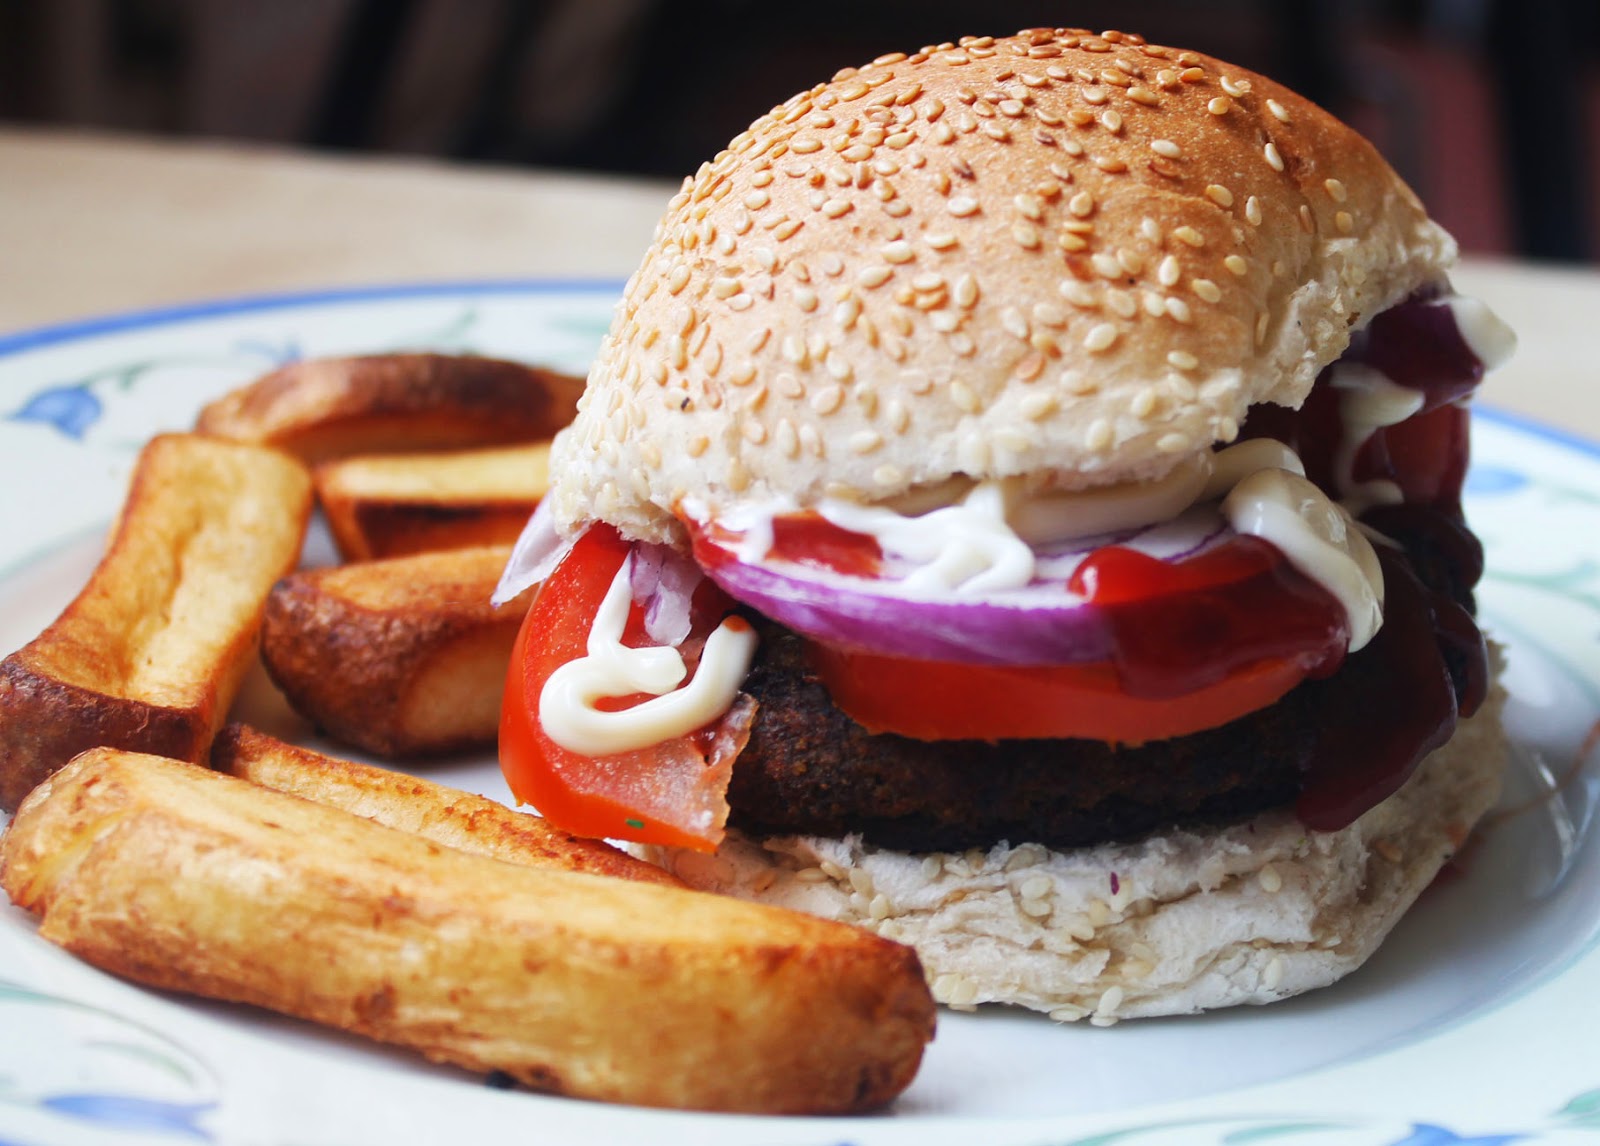
Chickpea Burger


  • 11/2 small onion, finely diced
  • 1 tablespoons olive oil
  • 1 carrot, peeled and cut into chunks
  • 3 cloves garlic, peeled
  • 1/2 cup fresh parsley leaves (add more herbs like dill, mint, and basil for a different flavor)
  • 1.5 cups cooked or canned chickpeas (if canned, be sure to rinse off the can-slime!)
  • 1  cup bread crumbs
  • 1/2 teaspoon salt
  • 1/4 teaspoon ground coriander
  • 1/4 teaspoon ground cumin
 
  1. Preheat oven to 400 degrees. Heat 1 tablespoon of the olive oil in a small saucepan over medium heat.
  2. Add the diced onion and saute, stirring occasionally, for five minutes, until soft and translucent. Remove from heat and place onions in a large bowl.
  3. In a food processor, blend carrot, garlic, parsley/herbs, and chickpeas until smooth. Add chickpea mixture to the bowl with the onions and mix to combine.
  4. Add bread crumbs, salt, coriander, and cumin to the chickpea mixture and mix until fully combined.
  5. Spray a baking sheet with olive oil spray or brush with olive oil. Form chickpea mixture into 4 patties about 3 inches across and 1/2 inch thick. Place patties on and baking sheet and use a pastry brush to brush patties with remaining 1 tablespoon of olive oil.
  6. Bake for   20-25 minutes, or until they begin to turn golden brown

  • Digg
  • Del.icio.us
  • StumbleUpon
  • Reddit
  • RSS

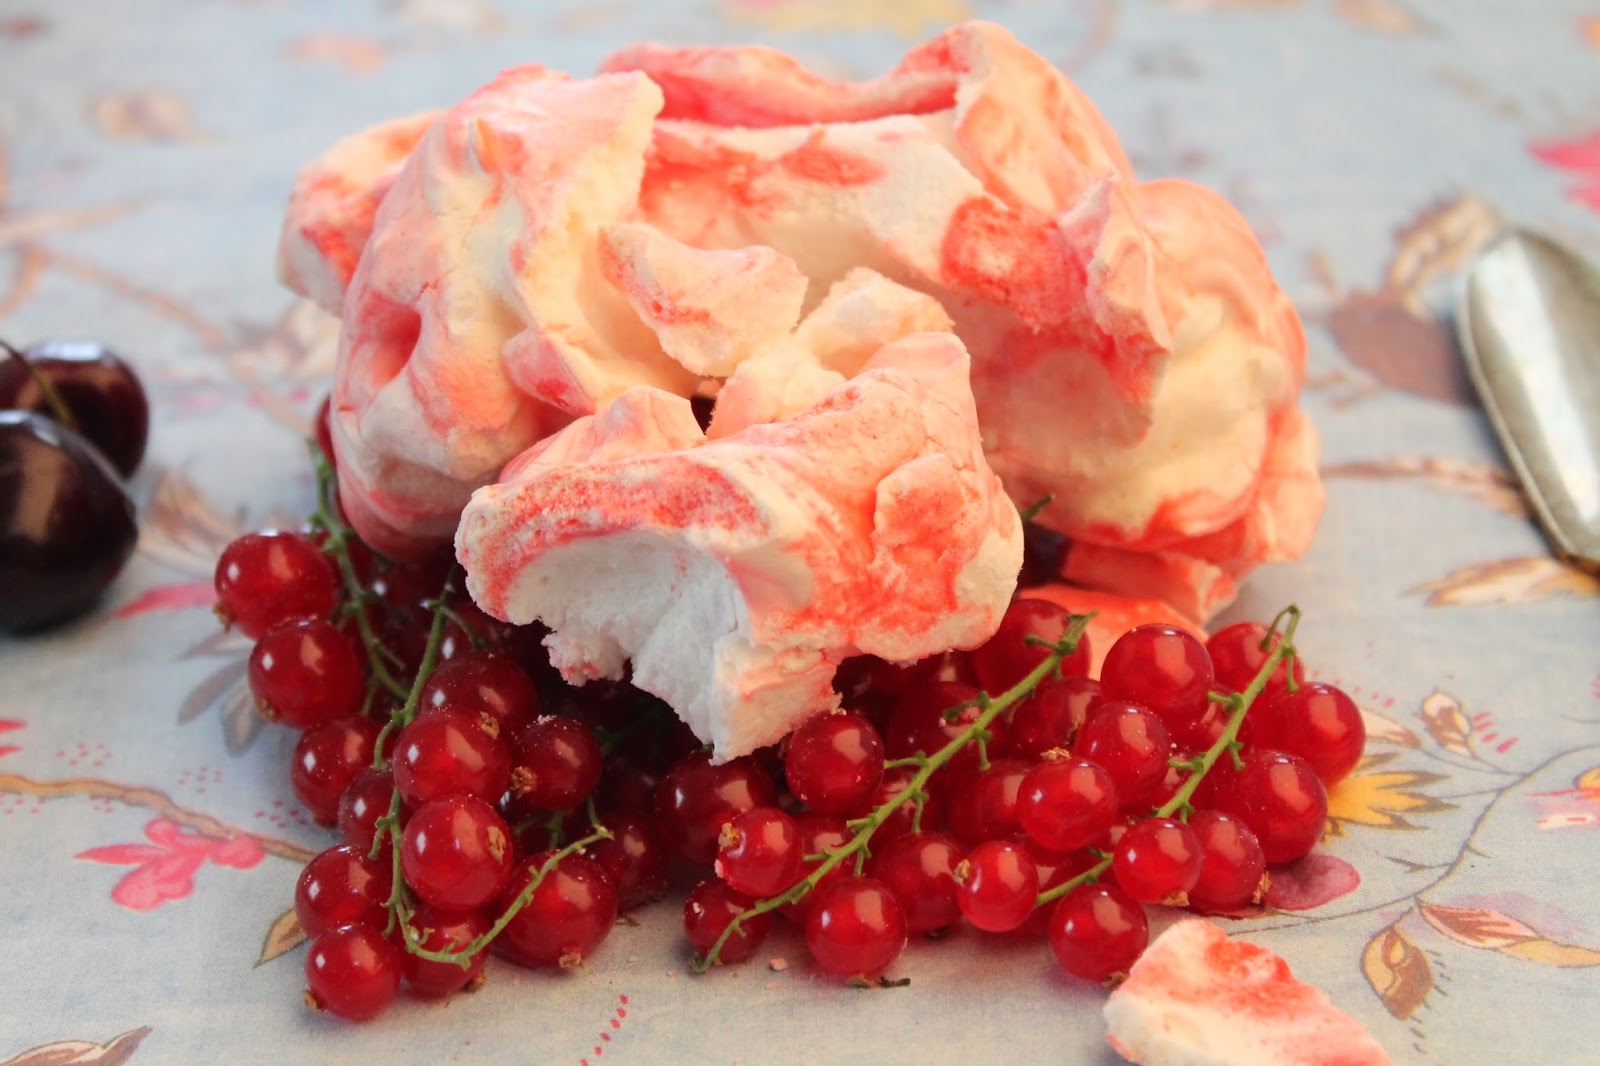
Berry Meringue


5 Egg whites from  
400 grams caster sugar
15gms raspberry powder
Frozen berries to paint and serve

Pre-heart the oven to 100C.  boil some water in a pot.  Place the egg whites and sugar in a heat proof bowl and place it on top of the simmering pot and whisk till the time the sugar is melted. Remove from the heat and beat the mixture till you achieved a glossy and fluffy meringue. Mix the fruit powder and swirl to achieve a marbled effect. Pipe it into the tray lined with a baking paper. Bake in the center of the over for 1 hour, after turning off the heat let it cool in the oven for 2 hours. Puree the frozen berries and paint it on the ready meringue and pop it back into the oven for 10 minutes to dry.


  • Digg
  • Del.icio.us
  • StumbleUpon
  • Reddit
  • RSS

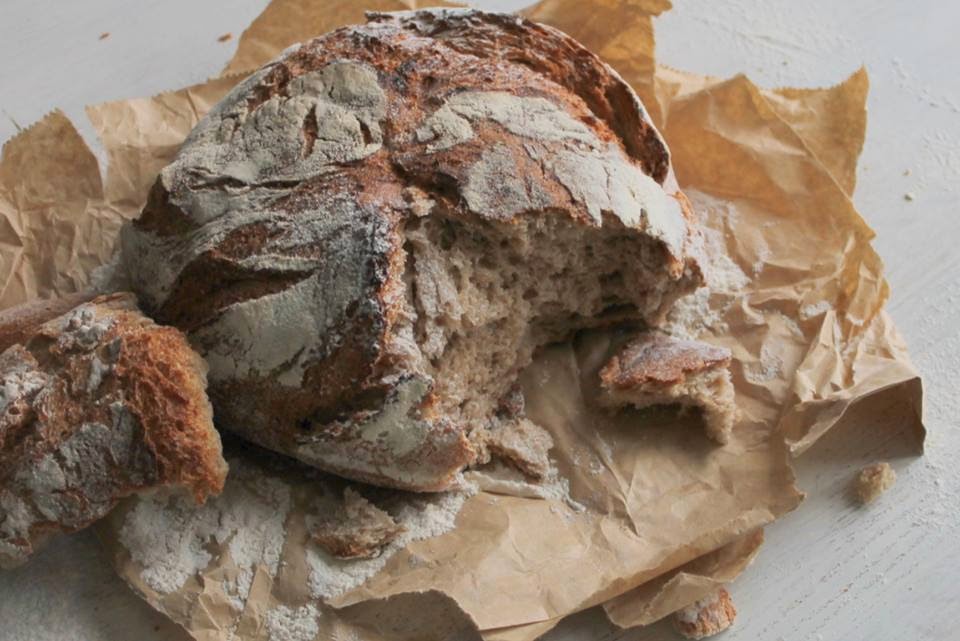
Rustic Crusty Bread


INGREDIENTS
3 cups strong bread flour  flour
 ½ tsp salt
½ tsp active dry  yeast
1½ cups Luke warm water
In a mixing bowl sieve together flour, salt and yeast. Mix in the water little by little bringing together the flour with the help of wooden frame until the dough starts resembling a ball. Wrap it with cling film for 2 hours, or until the dough rises to double of its size.
Preheat the oven to 450F. turn the flour to a lightly dusted surface and knead the dough for another 10 minutes and shape it in a ball. Place the dough on the middle rack of the oven, and cover it with a lidded cast iron, or a pyrex dish. Remove the lid and return the dough back into the oven for another 15 minutes, or until the loaf turns golden brown, or sounds hollow when knocked on. Cook it on a wire rack for few hours.
1.        


  • Digg
  • Del.icio.us
  • StumbleUpon
  • Reddit
  • RSS

Strawberry Summer Salad


Ingredients
For the Dressing
2 tablespoons extra virgin olive oil
1 tablespoon red wine vinegar
2 tablespoons honey
Salt and pepper to taste

For the Salad
4 strawberries  
1 small red onion  
A bunch of gem lettuce
Handful of nuts
Handful of croutons. 
Whisk together all the ingredients for the salad dressing. Wash the lettuce and pat dry. Hull the strawberries and quarter. Thinly slice the red onion. Toss the dressing with the salad.


  • Digg
  • Del.icio.us
  • StumbleUpon
  • Reddit
  • RSS

Gajar Ka Halwa


Serves 4
1 pounds grated carrots
2 tbsp ghee or butter
½ inch cinnamon stick
½ cup raw sugar
4 cardamom powdered
½ cup mix dry fruits, I used almonds, cashews and sultanas.

Bring milk to a boil in a heavy bottomed pan.  Tip in the carrots and the cinnamon stick on a medium flame keep stirring it occasionally till the time all the milk is absorbed. This will take approximately 40 minutes.  Add the ghee and cardamom powder. And keep stirring on low flame for 5 minutes till the time you see the sheen on the carrots. Add the dry fruits and sugar and stir again on slow flame. Serve warm or cold garnished with cream and mint.


  • Digg
  • Del.icio.us
  • StumbleUpon
  • Reddit
  • RSS

Gulab Jamun


Greetings from India. I am just back from home after enjoying the gorgeous and warm weather of Mumbai.  It is amazing to see how Mumbai,  one of the busiest cosmopolitan still holds its old age culture of festivals, food, and of course life in Mumbai can never be complete without the street food. Starting from  Bhel Puri, Pani Puri and Ragda Pattice and lassis. Oh what a paradise of food is Mumbai.


 Among-st these is Gulab Jamun, a must eat traditional  Indian dessert.  These succulent and spongy dumplings carefully blended from a combination of flour, butter and milk fats, smothered in a rose water syrup with the tempting aroma of cardamons  with a beautiful and delicate texture. oh such a royal delicacy. You can eat it hot or cold, serve it as a dessert for parties or get together or simply indulge yourself in. This is such a sinfully wicked gift from Mumbai.  My dad not very easy to please when it comes to food, we carefully buy such delicacies from the most noted ‘Halwai’ from Mumbai and then we have our usual tantrums of not eating Gulab Jamuns with the fear of gaining those extra calories. But this time it was a complete change in  the situation. Yes you guessed it right! my dad gave a seal of approval for this dish and there were none left only after a few minutes when the Gulab Jamuns were still warm.  I have recently started following Sala Kanan from Veggie Belly and happened to find this amazing recipe for Gulab Jamuns, so easy to make but so delicious, we will now never go to any of those specialist ‘Halwai’.

For sugar syrup
2 cup sugar
2 1/2 cup water
4 cardamom seeds, powdered in a mortar and pestle
A drop of rose essence, optional
A small pinch of saffron threads, optional
For the jamuns
1 cup unsweetened milk powder or dry milk (not coffee creamer)
1 tablespoon butter at room temperature
1/4 teaspoon baking soda
3 tablespoons flour
A pinch of salt, optional
1/2 teaspoon white distilled vinegar
1/3 cup whole milk

Place the sugar, water and cardamom powder in a small saucepan. Bring to a boil and watch for the sugar to dissolve. Once its dissolved, boil for another minute. Turn off heat and add rose essence and or saffron, if using. Set the syrup aside.
Now make the Jamuns. In a mixing bowl, add milk powder or dry milk, baking soda, flour and salt. Mix well.
Then add butter and vinegar. Add milk a little at a time and mix till it forms dough. You may not need all of the milk.
When a soft, sticky dough forms, stop adding milk. Cover and let the dough stand for about 20 minutes.
After resting, the dough will be less sticky, airy and a little firmer. If its too lose, sprinkle a little flour. If its too dry, add a little milk.
Knead the dough a few times.
Dip your fingers in oil or ghee, divide the dough into 24 even pieces and roll them into balls. Dip your fingers in oil as and when needed to avoid sticking.
Heat enough oil to deep fry in a saucepan pan on medium-low heat. Drop a small pinch of the dough in the oil to test the temperature. The dough should sink to the bottom and then slowly rise to the top. If it sits in the bottom of the oil without bubbling, the oil is not hot enough. If the dough rises and browns too quickly, the oil is too hot.
Add the jamun balls a few at a time and fry in oil on medium-low heat. Stir and turn the jamuns frequently so they brown evenly.
When brown, remove from oil using a slotted spoon and drain on several layers of paper towels.
Repeat with all the dough. Let fried jamuns cool.
Add the jamuns to the sugar syrup. Stir gently so the jamuns are well coated in syrup.
Cover and let the gulab jamuns soak in the syrup for atleast an hour before serving. Gulab jamuns will keep for several days at room temperature


  • Digg
  • Del.icio.us
  • StumbleUpon
  • Reddit
  • RSS

Have a Merry Berry Christmas!!


The weather has turned  and the evening getting darker, and in the blink of the eye it will be Christmas. We all working to making festive as joyful as we can.   This cheery season is my favorite time of the year. Meeting people for one or the other reason, that brings the spirit of Christmas out in all of us. In the run up to Christmas,  I love to start  the festive evening with  these more fashionable moctails. I choose to  celebrate the holiday season  with this classic berry drink, it fits the Christmas theme so perfectly. Viola, have a Fresh, fruity and fizzy  Christmas with this Berry Moctail. 

INGREDIENTS
1 cup cranberry juice
 1 cup orange and passion fruit juice
¼  cup lemon juice
1 cup soda water or lemonade
crushed ice
10  strawberries
10 raspberries
5 blackberries
5 blueberries

Tip in all the ingredients into an electric blender . Blend until smooth. Serve with a fresh slice of lemon and berry of your choice.


  • Digg
  • Del.icio.us
  • StumbleUpon
  • Reddit
  • RSS

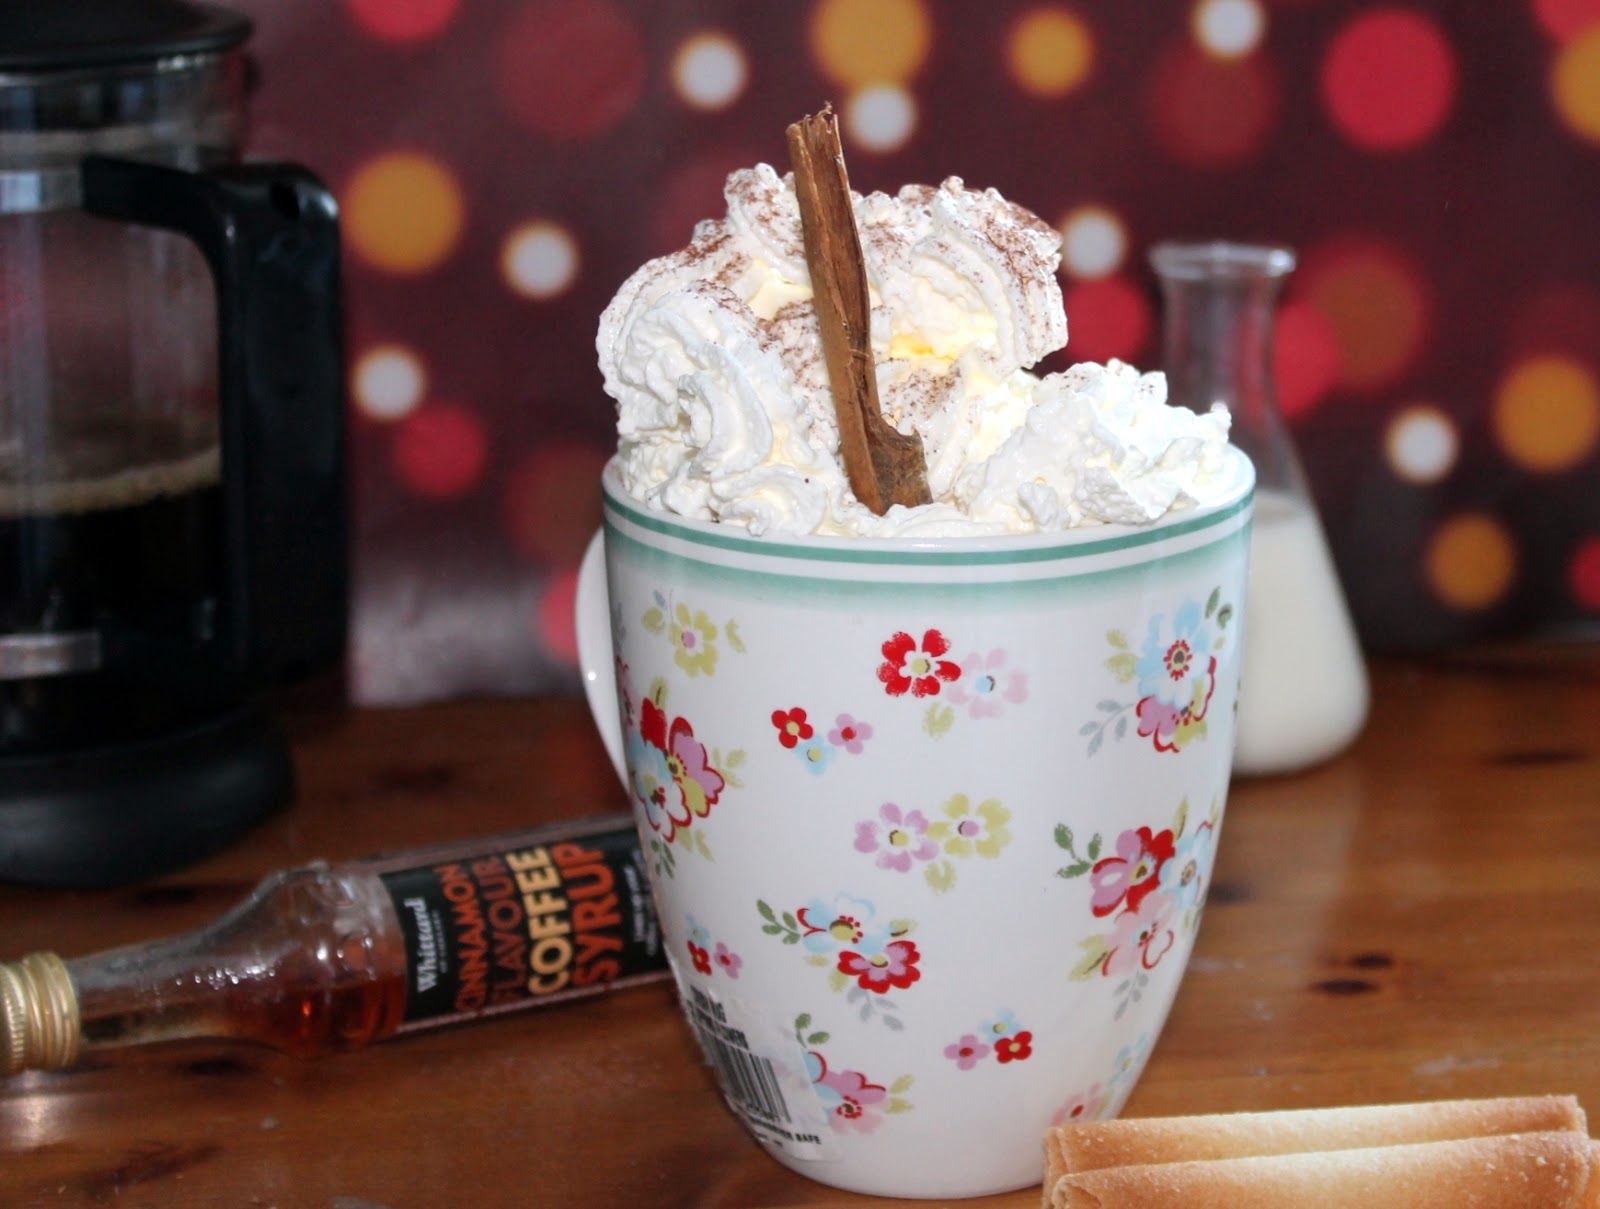
Classic Christmas Coffee

There is so much joy, so much excitement in the air, yes it’s the Christmas season, preparing to celebrate the birth of our Messiah! There are plenty many ways to enjoy a holy and a jolly ways to enjoy this beautiful festive season, oh I love writing the cards and wrapping up the gifts for my loved ones! Yes baking mince pies. Setting up the Christmas tree, making it a big event by heating up that creamy hot chocolate, nothing can be more satisfying that seeing that Christmas tree glittering with all the decorations and the gifts boxes beneath.  Well what if I want to go a bit further and make this festive season a bit more celebrating? What if I make a   classic Christmas Coffee? Oh yeah!  I can only find reasons to stir in the warmth of  some coffee into this the Christmas preparations. From wrapping the gifts, to deciding the menu for the Christmas meal, this amazing Classic Christmas Coffee finds its way as we head towards Christmas!  And like Susan Simmer says  ‘A merry coffee to warm the whiskers with’.

This recipe has been adapted from Susan Simmer’s I Love Coffee.


INGREDIENTS
45 ml brandy,
140 ml steamed milk,
2 ½ teaspoons cinnamon  syrup,
¾ cup freshly brewed coffee,
Whipping cream to serve,
Cinnamon stick to garnish,

Combine the brandy, and 1 ½ teaspoons of cinnamon  syrup in a heated mug or cup.

Add the steamed milk to this.

Fill the rest of the cup with coffee,

In a small bowl, combine the whip cream with the remaining 1 teaspoon of cinnamon syrup and whip until soft peaks form.

Garnish the coffee with whipped cream with the help of a piping bag and serve with a cinnamon stick. 

  • Digg
  • Del.icio.us
  • StumbleUpon
  • Reddit
  • RSS

Cinnamon raisin Bagels


At the end of the busy week, I had an extensive roll in my mind of   to do list. I truly wanted to bake something out of the ordinary for the weekend.  My mind was inundated with ideas I thought, I would have been able to get through it even if I had a whole year off just to bake, but that’s okay,  I will get to it all sooner or later!  These dazzling cinnamon and raisin bagels were right at the pinnacle of my roll.  I initially made   bagels last summer, and after making them fruitfully quite a few times since, I have been in the making to endeavor some variations.  Cinnamon raisin was reasonably the foremost picking, and trust me these bagels were oh heavens.  I used the recipe from  Peter Reinhart's Break Baker's Apprentice.  I had no idea that it will get so enhanced than just the ordinary home-made bagels, but now we’ve gone to a whole other altitude of these awe-inspiring beauties.  I am now absolutely motivated to try loads more flavoured adaptations, some customary and perhaps some not so traditional. Oh everyone will find these homemade bagels so irresistible! 


Sponge
1 teaspoon instant yeast
4 cups (18 oz) bread flour
2 1/2 cups (20 oz) water, at room temperature

Dough
1/2 teaspoon instant yeast
3 3/4 cups (17 oz) bread flour
1 tablespoon ground cinnamon
5 tablespoons sugar
2 3/4 teaspoons salt
1 tablespoon honey or brown sugar
2 cups loosely packed raisins, rinsed 

To Finish
1 tablespoon baking soda
cornmeal for dusting

To make the sponge: Whisk the yeast and flour together in the bowl of a stand mixer. Add the water and whisk until incorporated - the mixture will be fairly thick and sticky. Cover the bowl with plastic wrap and let it sit at room temperature for about 2 hours, or until the mixture becomes very bubbly and swells to almost double its original size. 

To make the dough: Add the additional yeast to the sponge and stir to incorporate. Add 3 cups of the flour, the cinnamon, sugar, salt and brown sugar (or honey) and attach the bowl to your stand mixer, fitted with the dough hook. Mix on low speed until the ingredients come together in a ball, gradually adding the remaining 3/4 cup flour to stiffen the dough. In the last few minutes of mixing, add the raisins and allow the mixer to incorporate them into the dough. 

Kneading the dough: You can continue to knead in your mixer, but fair warning, the dough is very heavy. I didn't want to risk damaging my mixer so I did it by hand. By hand you'll have to knead the dough for at least 10 minutes - you want a pliable, smooth dough that's satiny and not tacky to the touch. You can add additional water or flour as necessary to achieve the right consistency. 

Divide the dough into 4 1/2 oz pieces for the bagels (that will make a fairly large bagel so feel free to use smaller portions if you prefer). Shape each piece into a roll and place on a parchment-lined baking sheet. Cover with a damp towel and allow to rest for about 20 minutes.

Line two baking sheets with parchment and spray them lightly with nonstick cooking spray. 

To shape the bagels: Flatten the ball of dough slightly then poke a hole through the center. Stretch and rotate the dough until the hole is about 2 1/2 inches in diameter (or slightly smaller if you've made your portions less than 4 1/2 oz each). Transfer to the prepared baking sheet and repeat with all of the dough balls (dividing them evenly between the two baking sheets). Spray the tops of the bagels lightly with nonstick cooking spray and cover each baking sheet loosely with plastic wrap. Allow to sit at room temperature for about 20 minutes. 

To determine whether the bagels are ready to be retarded in the refrigerator use the "float test." Fill a small bowl with room temperature water and place one of the bagels in the water. If the bagel floats within 10 seconds of being placed in the water, they are ready to move to the fridge. If so, remove the bagel from the water, pat dry and place back on the baking sheet. (Note: you only need to test one bagel - not all of them.) If the bagel doesn't float, continue to proof at room temperature and perform the float test again every 10-20 minutes, or until it floats. When the bagels are ready to be retarded, place the loosely covered baking sheets in the refrigerator overnight (or up to 2 days). 

When you're ready to bake the bagels, preheat oven to 500 F, with racks in the upper and lower thirds of the oven. Bring a large pot (the wider the pot, the better) of water to a boil, then add the baking soda.

Remove the bagels from the refrigerator. A few at a time (as many as can comfortably fit in your pot), drop them into the boiling water. They should float to the top fairly quickly. Boil for 1 minute per side, flipping them with a spider strainer. While the bagels are boiling, dust the baking sheets they were on with cornmeal. Remove the bagels to the dusted baking sheets and repeat until they've all been boiled. 

Bake both pans of bagels in the oven for about 5 minutes, then rotate the pans (switch the racks they're on and give them a 180-degree flip). Reduce the oven temperature to 450 F and continue baking for another 5 minutes, or until the bagels are light golden brown. Transfer the pans to wire racks and let the bagels cool for at least 15 minutes before serving.

  • Digg
  • Del.icio.us
  • StumbleUpon
  • Reddit
  • RSS

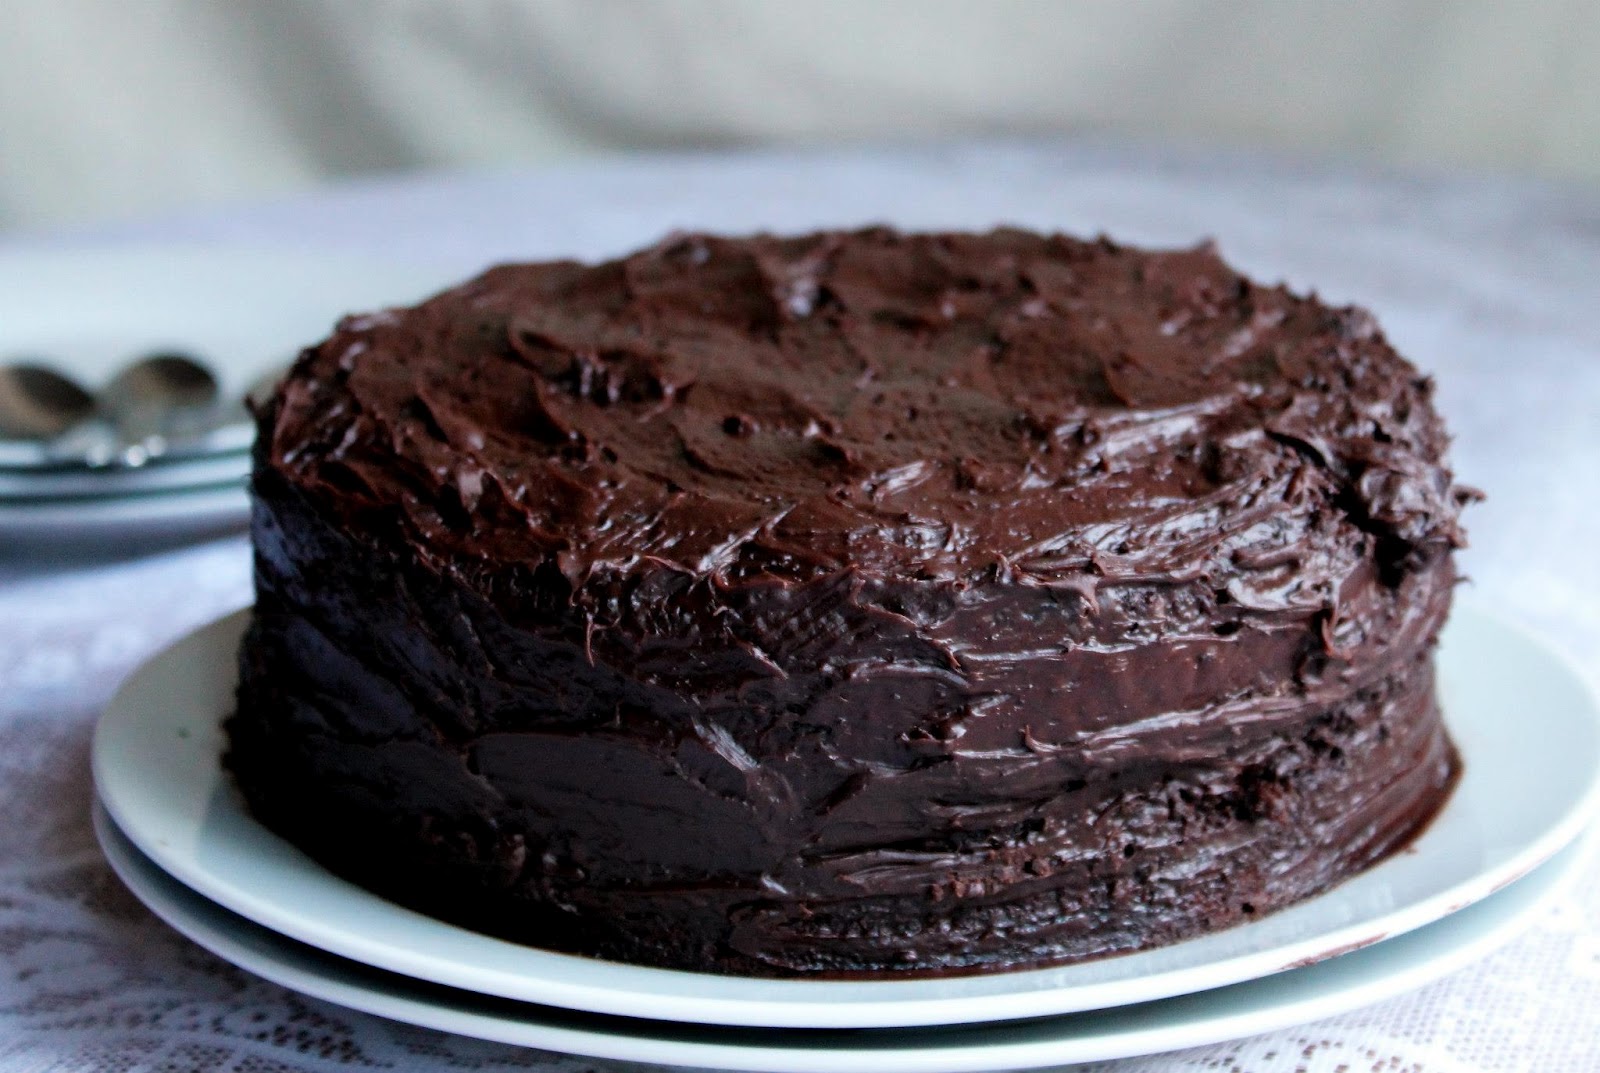
Devil's Food Cake


It’s the commencement of September and here I am to excite the devil in you with this luscious Devil’s Food cake. This devil's food cake is an absolute quintessential chocolate cake. It is so dense, so moist and so rich with the dark chocolate frosting .   This cake is absolutely gratifying only a true chocolate love would know.  . The frosting is a dark chocolate frosting, so thick just sticks to the palate of your mouth.  The combination of muscavado sugar and unsweetened chocolate, brings out this frosting so dark, so rich,   and so intense. This frosting combined with the devil's food cake, this is simply a heavenly   combination. There is something so special about this chocolate cake,  no heaps of the densely sweet butter-cream, oh just the chocolate cake and the chocolate frosting. Don’t go by the name, you simply would love this chocolate cake. I choose the recipe from Nigella Lawson’s recipe and I simply adore all her recipes, they work out miracles for me. Everyone was so impressed with the Cake, they asked me more than once, ‘Did you make it?’


The Cake
50 Grams Cocoa powder sifted
100 Grams Dark muscovado sugar
250 Millilitres Water boiling
125 Grams Unsalted butter soft - (plus some for greasing)
150 Grams Caster sugar
225 Grams Plain flour
1 Teaspoon baking powder
1 Teaspoon bicarbonate of soda
2 Teaspoon Vanilla extract
2 Medium Eggs


Frosting
125 Millilitres Water
30 Grams Dark muscovado sugar
175 Grams Unsalted butter cubed
300 Grams Dark chocolate finely chopped

Preheat the oven to 180°C/gas mark 4.
Line the bottoms of both sandwich tins with baking parchment and butter the sides.
Put the cocoa and 100g dark muscovado sugar into a bowl with a bit of space to spare, and pour in the boiling water. Whisk to mix, then set aside.
Cream the butter and caster sugar together, beating well until pale and fluffy; 

While this is going on – or as soon as you stop if you’re mixing by hand – stir the flour, baking powder and bicarb together in another bowl, and set aside for a moment.
Dribble the vanilla extract into the creamed butter and sugar – mixing all the while – then drop in 1 egg, quickly followed by a scoopful of flour mixture, then the second egg.
Keep mixing and incorporate the rest of the dried ingredients for the cake, then finally mix and fold in the cocoa mixture, scraping its bowl well with a spatula.
Divide this fabulously chocolatey batter between the 2 prepared tins and put in the oven for about 30 minutes, or until a cake tester comes out clean.
Take the tins out and leave them on a wire rack for 5–10 minutes, before turning the cakes out to cool.
But as soon as the cakes are in the oven, get started on your frosting: put the water, 30g muscovado sugar and 175g butter in a pan over a low heat to melt.
When this mixture begins to bubble, take the pan off the heat and add the chopped chocolate, swirling the pan so that all the chocolate is hit with heat, then leave for a minute to melt before whisking till smooth and glossy.
Leave for about 1 hour, whisking now and again – when you’re passing the pan – by which time the cakes will be cooled, and ready for the frosting.
Set one of the cooled cakes, with its top side down, on a cake stand or plate, and spread with about a third of the frosting, then top that with the second cake, regular way up, and spread the remaining frosting over the top and sides, swirling away with your spatula. You can go for a smooth look, but I never do and probably couldn’t.


  • Digg
  • Del.icio.us
  • StumbleUpon
  • Reddit
  • RSS